Ethereum Account State: A Minimal Token with Reconstructible State
I built this project to answer a simple question: can you reconstruct a token’s entire state just from events, without ever reading storage?
I got it wrong the first time. I processed both Burn and Transfer(to=address(0)) and ended up double-counting supply. The fix is straightforward but easy to miss: treat Transfer(..., address(0), ...) as the canonical burn signal and ignore Burn events from the same transaction.
This matters because event-based reconstruction is the foundation for indexers, audit tools, and historical state queries. If you can’t reliably rebuild state from events, you’re stuck reading storage directly, which works for current state but fails for historical queries and verification.
This post walks through the implementation: a deliberately small Solidity token, a TypeScript domain model that mirrors the on-chain state machine, and a React frontend that demonstrates event-based reconstruction. The code is in egpivo/ethereum-account-state.
On-chain state machine design
The contract (contracts/src/Token.sol) is intentionally tiny: three functions (mint, transfer, burn) and three events (Mint, Transfer, Burn). I kept it minimal so the state transitions are obvious:
- Mint:
totalSupply += amount,balances[to] += amount - Transfer:
balances[from] -= amount,balances[to] += amount(supply unchanged) - Burn:
totalSupply -= amount,balances[from] -= amount
I used Solidity’s user-defined value types (0.8.8+; this repo uses 0.8.28) for type safety: type Balance is uint256, with a BalanceLib for add(), sub(), gte(), and zero(). It prevents mixing balances with unrelated uint256 values and compiles down to zero-cost wrap/unwrap conversions.
The invariant sum(balances) == totalSupply can’t be checked on-chain because mappings aren’t enumerable. It’s guaranteed by construction. Off-chain, we can actually check it by summing a Map<address, Balance>.
Event design and burn semantics
When burn() is called, the contract emits two events:
emit Burn(from, amount);
emit Transfer(from, address(0), amount); // ERC20 canonical supply reduction
Both events describe the same burn. They even have different logIndex values, which makes naive reconstruction extra risky. The rule I follow: use Transfer(..., address(0), ...) as the canonical burn and skip Burn events from the same transaction. That matches ERC20’s burn semantics. (ERC20 also uses Transfer(from=address(0), ...) for mints; this token uses a separate Mint event, so reconstruction follows the contract’s events, not full ERC20 event semantics.)
Off-chain domain and validation
The TypeScript domain layer (domain/) mirrors the on-chain state machine so the rules are enforced in both places:
domain/entities/Token.tsholdstotalSupplyand aMap<address, Balance>, withmint(),transfer(), andburn().domain/value-objects/wrapsAddressandBalanceto avoid mixing raw strings or numbers with domain values.domain/services/StateTransition.tsvalidates the same conditions the contract reverts on (zero address, zero amount, insufficient balance).
WalletService (application/services/WalletService.ts) uses those checks before sending a transaction:
- Reconstruct current state from events.
- Validate the transition (
StateTransition.validate*()). - Encode and send the transaction via
ethers.Interface.
If validation passes off-chain but reverts on-chain, it’s likely a domain bug or stale/off-chain state (e.g., a new block, reorg, missing events, or mempool race between reconstruction and execution).
State querying and event reconstruction
StateQueryService (application/services/StateQueryService.ts) supports two ways to read state:
- Storage reads:
getTokenBalance()andgetTotalSupply()useeth_call. - Event reconstruction:
reconstructStateFromEvents()rebuilds state fromMint,Transfer, andBurnevents.
The reconstruction logic is simple but strict:
- Sort all events by
(blockNumber, txIndex, logIndex)so ordering is well-defined (logs are ordered within a tx bylogIndex, but merging multiple event queries can scramble order otherwise). - Group events by transaction hash.
- If a tx includes any
Transfer(..., address(0), ...), mark it as a burn tx. - Skip
Burnevents for burn txs. - Apply events in that order:
Mintincreases supply,Transfer(to != address(0))moves tokens,Transfer(to == address(0))decreases supply.
This avoids double-counting and keeps the invariant intact.
compareState() reads storage state and compares it to reconstructed state. In production this is best-effort only: event reconstruction can be incomplete (pagination limits, missing history, chain reorganizations), so mismatches are logged as warnings rather than hard errors.
Why event reconstruction matters (and when it doesn’t)
It’s slower than storage reads and less reliable if you don’t have full history. But it enables things storage can’t:
- Historical state queries without archive storage.
- Indexer validation and audit trails.
- Tests that verify invariants using just events.
Infrastructure layer
The infrastructure layer (infrastructure/ethereum/) wires everything to Ethereum:
EthereumProviderwrapsethers.Providerwith connection handling.ContractRepositoryimplementsITokenRepositoryusing event reconstruction, and compares to storage as a diagnostic check.
The repository intentionally favors reconstructed state even if diagnostics warn, because this is more of an educational/verification tool than a production indexer.
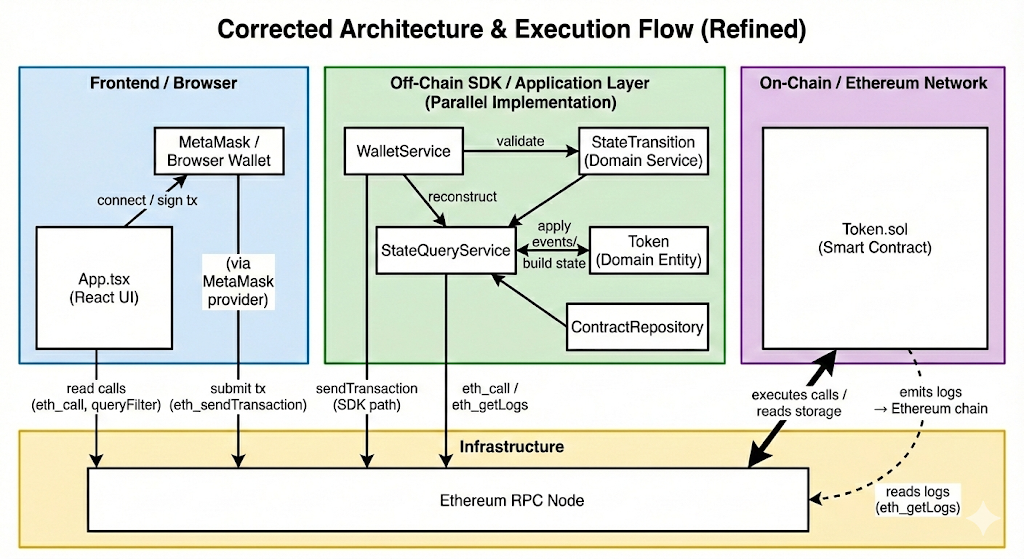
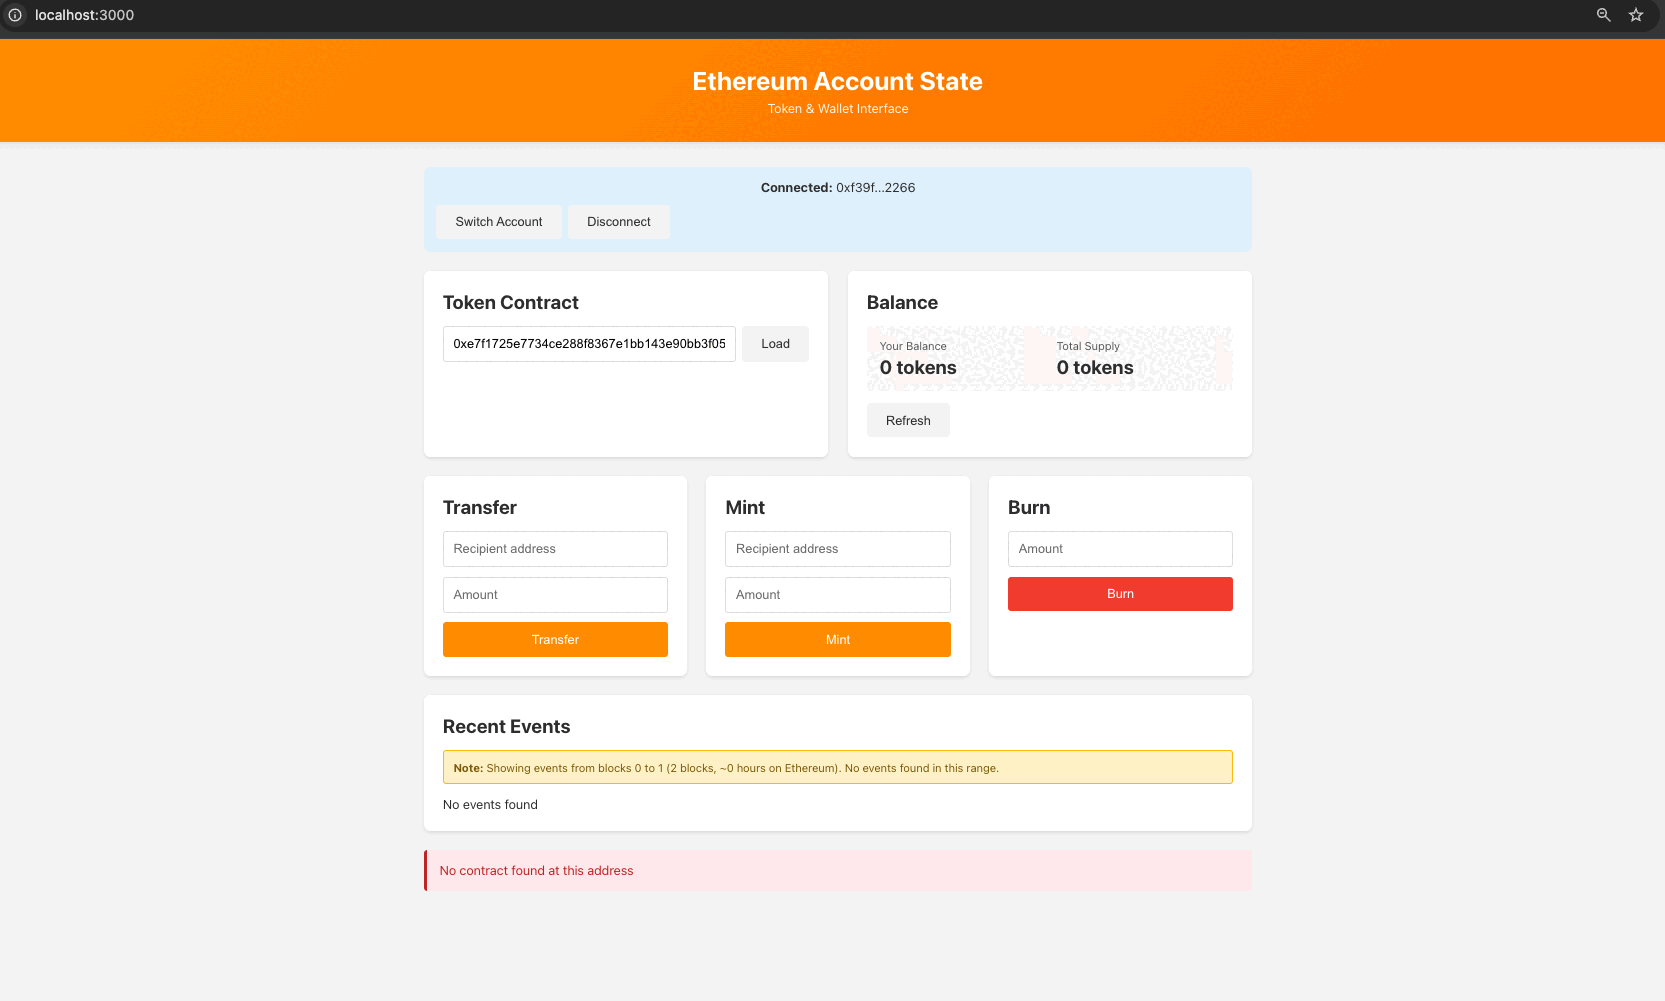
Frontend integration
The React frontend (frontend/src/App.tsx) is a minimal demo of the contract interface:
- Connects via
ethers.BrowserProviderand a MetaMask signer. - Displays
balanceOf()andtotalSupply(). - Sends
mint(),transfer(), andburn()calls. - Shows the last 20 events, deduplicating burns the same way as the backend (treat
Transfer(to=0)as canonical).
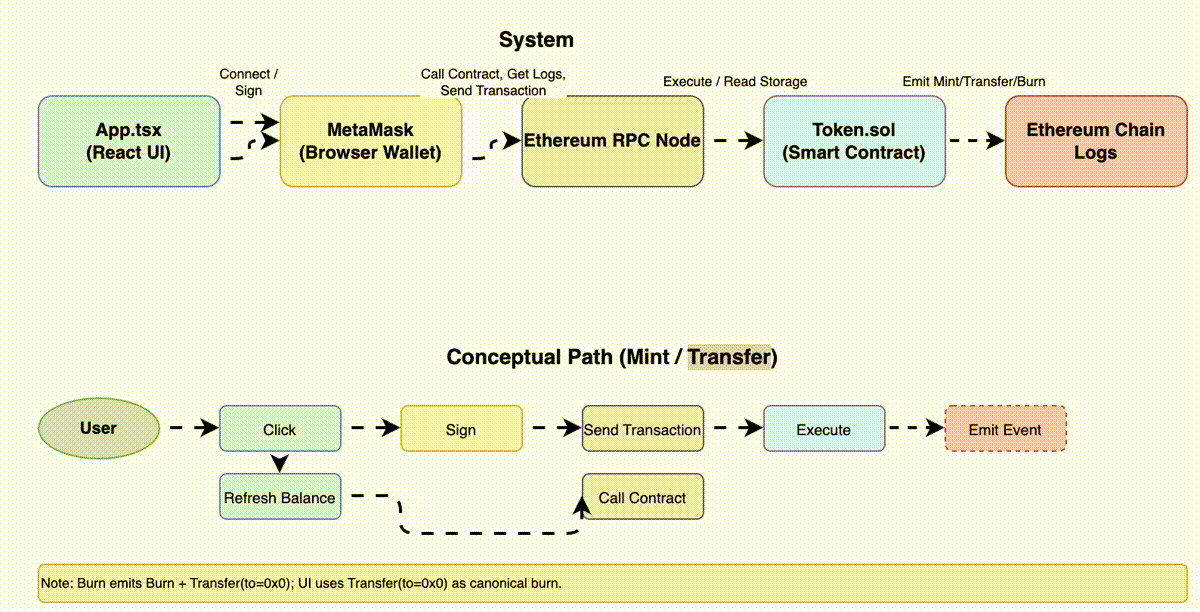
Burn and Transfer(to=0), but the UI/reconstructor treats Transfer(to=0) as canonical.
The frontend doesn’t use the domain layer or WalletService; it’s intentionally direct.
Demo steps
If you want to run the full demo locally:
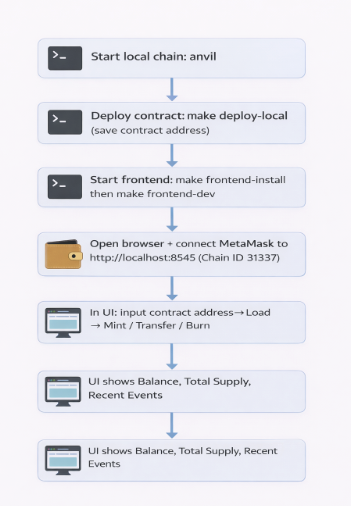
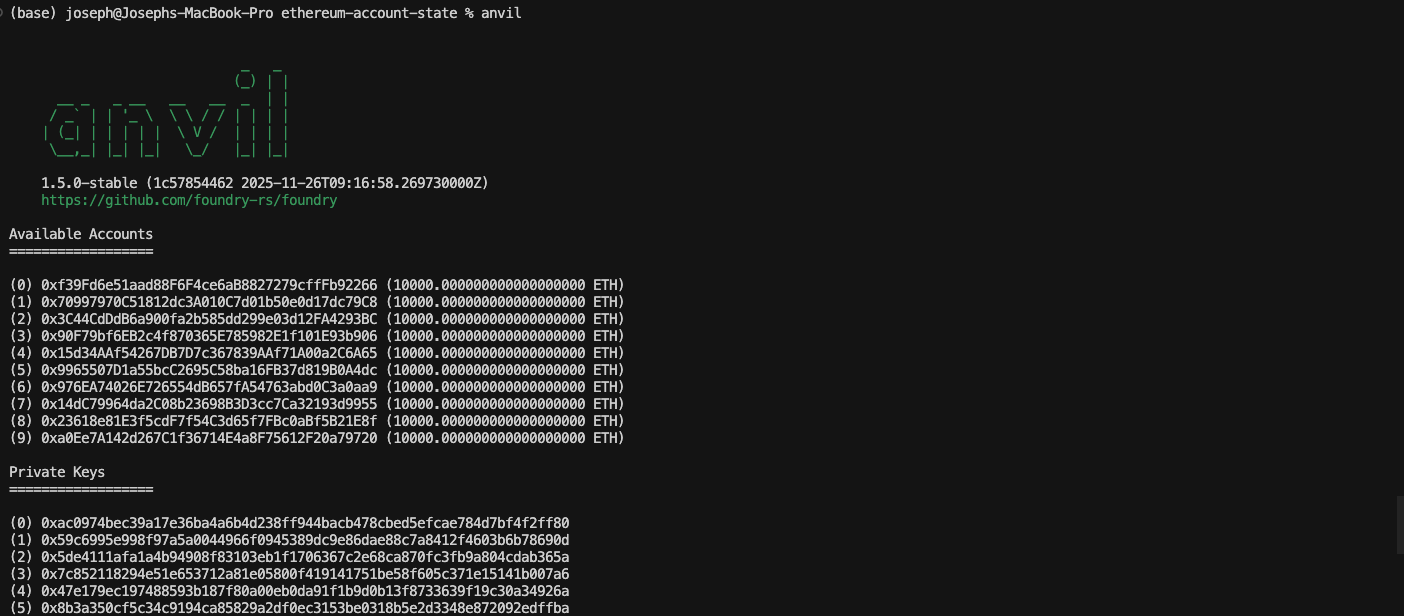
- Start Anvil (local Ethereum node):
anvil
- Deploy the contract:
make deploy-localThis deploys the Token contract to Anvil and prints the contract address.
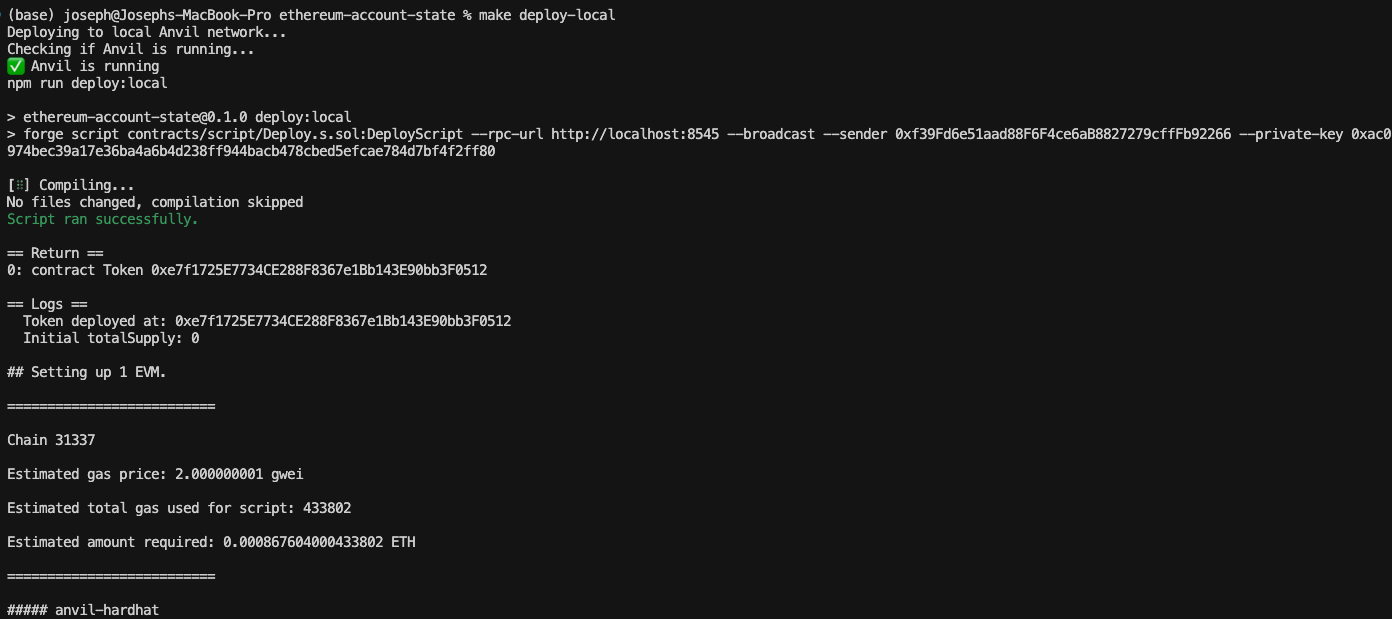
make deploy-local: the script connects to Anvil, deploys Token.sol, and prints the deployed contract address you will paste into the UI.
- Install frontend dependencies:
make frontend-install - Start the frontend dev server:
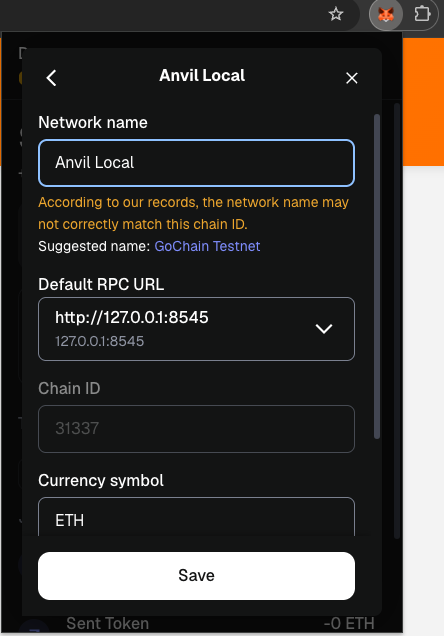
make frontend-dev - Add Anvil network and account in MetaMask (required for the demo):
- In MetaMask, add a new network: Network name e.g., “Anvil Local”, RPC URL
http://127.0.0.1:8545, Chain ID31337. (MetaMask may warn that the name doesn’t match the chain ID; that’s fine for local use.) - Use one of Anvil’s default accounts: when you run
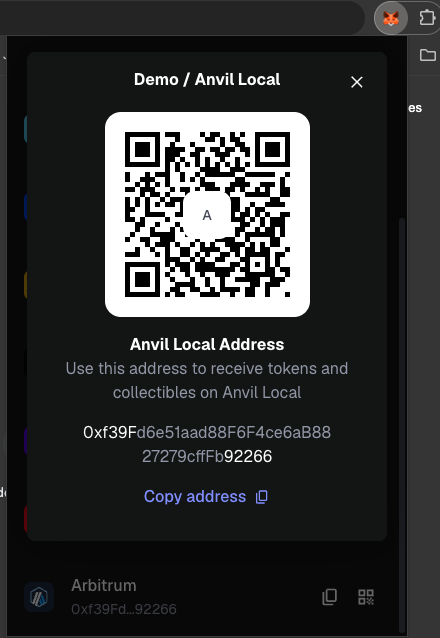
anvil, it prints private keys and addresses. Import one of those into MetaMask so you have test ETH and can receive tokens on the local chain.
- In MetaMask, add a new network: Network name e.g., “Anvil Local”, RPC URL
- Connect MetaMask in the app:
- Open the frontend in your browser, then click “Connect Wallet” and approve the connection. Ensure MetaMask is set to the Anvil Local network.
- Load the contract:
- Paste the deployed contract address into the “Token contract address” field.
- Click “Load” to fetch balance and total supply.
- Test operations:
- Mint: Enter a recipient address and amount, click “Mint”.
- Transfer: Enter recipient and amount, click “Transfer”.
- Burn: Enter amount, click “Burn”.
- After each operation, click “Refresh” to see updated balances.
Transfer(to=0)) entries.
- View events:
- The “Recent Events” section shows the last 20 events from the last 1000 blocks.
- Burns appear as “Burn” type (from
Transfer(..., address(0), ...)). - Click “View” to open the transaction on Etherscan (for Sepolia/mainnet) or see the hash (for local).
The full code is in egpivo/ethereum-account-state.